Shoe Dressing and Care 1st March 2017
Looking after footwear not only makes them look great but it is vital for keeping them in good condition, this in turn greatly increases their longevity which is desirable when stretching the purse strings for premium products, but where to start?
There are so many different creams, waxes, sprays, brushes etc that knowing what you need and what to do becomes a confusing mess; with the numerous blogs and differing advice available online it can cause a real headache.
We are going to guide you through different products and techniques to try and help you obtain the results you want and give you the tools needed to make sure you get the best from your footwear.
To start with you need to assess the condition of your shoes and what material they are as not all leathers are treated in the same way.
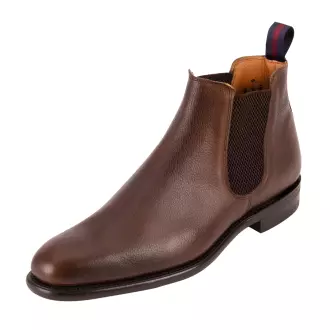
Calf leather
More Details
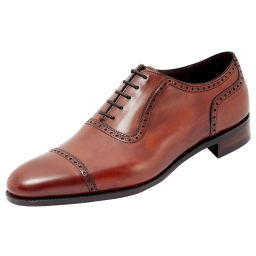
We are going to look at calf leather and grain calf leather first. The only real difference between these two leathers is that grain calf is textured. This effect is made by simply imprinting smooth calf leather. So shoe care for both leathers would be the same.
If you have a new pair of calf or grain calf shoes we would always recommend giving them a quick once over with a reputable wax polish which will give the shoes a little more protection to the elements, other than that they should be good to go.
I am now going to describe the process of cleaning a pair of calf/calf grain shoes from the very start. Dependent on the condition of your shoes you can skip some stages.
Firstly remove the laces and ensuring that your shoes are dry use a large Saphir brush to remove all loose dirt and debris with a brisk firm action.
If your shoes are relatively clean after this stage and have not been moisturised for a few weeks you can move straight to renovation. If your shoes are clean and have been moisturised recently then skip to the application of a wax cleaner.
For dirty shoes you will need saddle soap, this is a mild cleaner and is for light to moderate dirt, please note that this will not remove accumulations of wax polish.
The Saphir saddle soap has a handy application sponge within the container. Simply moisten the sponge with warm water rub it in the soap and then with moderate pressure rub the sponge over the shoes. You will notice that foam appears when cleaning the shoes; this will need to be removed by rinsing the sponge of soap and then taking the suds off. Continue to rinse the sponge and repeat the process until all suds have been removed. You will need to wait until the shoes are completely dry before moving on, around 2-3 hours should be fine.
If your shoes have a large accumulation of wax then you may consider stripping the wax back to the natural leather as wax build up can interfere with products being able to penetrate the leather properly.
To do this you will need a solvent cleaner such as Saphir Renomat. Caution is advised when using this product as it is a harsh cleaner
Using a clean cloth around the fore fingers apply a very small amount on the cloth and dab off excess liquid on the rim of the bottle. Using very light (important) circular motions rub the cloth over the shoes. You should find upon inspection of the cloth that colour is transferring, this should be the wax. If you rub too hard then you can rub through the wax and remove the finish of the shoes so please do be careful. Once you have gone over the whole of the shoe you should be left with a dull matt finish to the shoes. Wait around 15-20 minutes for the shoes to dry, then, give them a quick brush with a saphir polishing brush.
Once your shoes have dried naturally then you can proceed to the next stage which is rejuvenation. This essentially involves rehydrating the leather. As you will already know, leather is the tanned skin of an animal. As the skin is now no longer a part of a living being it cannot repair itself and as such needs to be cared for. If leather dries out, it will crack, once this has happened it cannot be restored to its original state so moisturising or “feeding” the leather is of utmost importance.
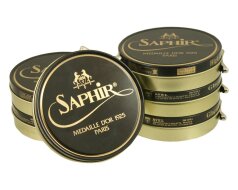
To rejuvenate the leather a renovator is required. Saphir Renovateur is in our eyes one of the best on the market and is certainly one of Saphir’s most popular products. It is a mink based conditioning cleaner which also contains waxes for a soft sheen.
Using a soft clean cloth apply the cream to the shoes using moderate pressure, this will help work the product deep into the leather. You only need a small amount and a little really does go a long way.
Leave the shoes to dry for approximately 5 minutes, we would not recommend leaving the product on for too long as it can then take more effort to remove the residue.
Buff with a Saphir polishing brush to remove the residue. You should now be left with a pleasant sheen to the shoes.
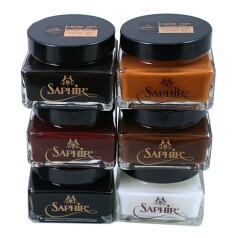
Once rejuvenated, we would recommend using a colour cream before using a solid wax product. The reason for this is that colour creams have a higher amount of colour pigmentation which penetrates the leather better. This helps both enhance the colour of the shoes and helps cover any scratches or scuffs that you may have picked up, it also provides a great base for the wax and can also be used as a stand alone product if you do not want a higher shine on your shoes.
The Saphir Pommadier Cream is excellent for this task and besides having high colour pigmentation it also has extra renovating properties with its 7 wax based formula combining both soft and hard waxes.
More Details
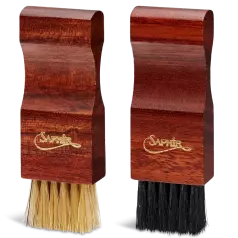
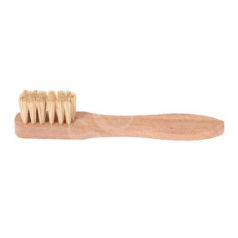
You can apply the cream with a soft cloth but our preference is the Pommadier brush which is designed specifically for this product. The brush allows the cream to be worked into the leather better and also can be guided around the welt of the shoe with ease, getting into the spaces where a cloth cannot. For intricate parts the small applicator brush is also ideal.
More Details
More Details
To get the most from this product we would apply between 2-3 even coats (one on top of the other) leaving 10 minutes between each coat to dry. Once finished, buff the shoes to a shine with the polishing brush.
Once you have used a wax cream you can then wear the shoes, however should you want a better shine then you will need to use a hard wax polish such as Saphir Pate de lux.
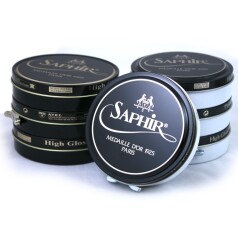
More Details
For a standard shine apply the polish with a cloth to the shoes with circular motions covering the whole shoe. The shoes can then be set aside for an hour or two. Once dried brush off with a polishing brush and then buff with a cloth.
If you require a mirror shine then you will need to use a technique called bulling which requires the building up of wax layers. Be aware that this technique takes practice, time and you may not get it right with your first attempt. It is worth noting that you should only mirror shine the toe cap of your shoes (heels are also acceptable). If you try and do the entire shoe you will find that the layers of wax you have built up will crack and flake around any areas of creasing which will look unsightly.
The bulling technique uses water so I find using the lid of the wax polish to keep the water in handy.
To start the process I have personally found that putting a few layers of wax on the shoe before hand makes the job easier. So to start and using a clean dry cloth, apply a layer of wax evenly on the area of the shoe you wish to shine. Let this dry completely so leave it a few hours then repeat. I find 2 layers are a good base.
Once this has set you are ready to start bulling. Making sure that you have your cloth wound tightly around your forefingers apply another layer of fresh wax to the area required. Use intricate circular motions and keep going until you feel a little “drag”, once you feel the resistance dip your cloth covered fingers into the water. You literally only need a droplet so don’t go crazy at this stage. With the droplet, go back over the shoe with the same intricate circular motions. What you should notice is that the water causes the wax to look greasy or smeared, this is what you are looking for. Keep up with the circular motions until again you feel drag. You can then add another droplet of water. Repeat the process. You will find that every time you add a fresh droplet that the shine will continue to develop. Be careful not to use too much water as this can affect the process, too much and the shine won’t develop meaning you will have to wait a few hours for the shoe to dry before attempting again. Remember to only use a light action, if you press to hard you will move the wax rather than polish it.
Suede
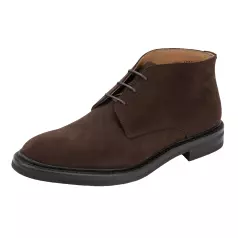
More Details
People are often put off by suede leather but given the right pre-care and maintenance there is no reason why you cannot keep your suede shoes looking in excellent condition.
Firstly I would always recommend using a suede leather protector before use, just a light spray over the shoes will suffice and allow 10 minutes to dry. This will help repel water, dirt and stains.
Often the use of either a crepe brush or a suede brush can be underestimated in the upkeep of suede shoes but for me they are an essential and very easy to use. My personal favourite is the Saphir brass brush which is great for removing dust, mud and keeping the nap of the suede alive. Making sure that your suede shoes are perfectly dry, give them a light brushing. Try not to be too vigorous as over brushing can damage the fibres.
For small marks and stains that cannot be removed use the Saphir suede cleaning block, use in much the same way as an eraser and lightly rub the effected area. Once finished use your suede brush to remove any residue left from the block and to raise the nap.
If your suede as become quite soiled and they cannot be cleaned by either brushing or a cleaning block then you will need Saphir Suede multicleaner. The box includes a bottle of solution and a small application brush. To use simply add few drops to a cup of warm water and stir. Dip in your applicator brush and work into the suede to form a lather, continue to do this for the entire shoe. Once done you will need to make sure that you remove all suds and solution from the suede by using the brush again and clean water.
Allow the shoes to dry completely before using your suede brush to raise the nap.
Once finished a spray with your suede weather protector will get them ready for wearing again.
Waxed leather
More Details
Waxed or waxy leather has been specially treated to be more weather resistant which is achieved by impregnating the leather with a heavy based wax/oil and as such should not be treated in the same as a traditional calf leather shoe.
The main cleaning product used for waxed leather is dubbin which is essentially a grease designed for leather. This product will clean and rejuvenate the wax content of your waxed leather shoes but some find that it can slightly darken the footwear due to its heavy set nature. Use sparingly and apply with a cloth evenly over the whole shoe, working in with circular motions.
More Details
More Details
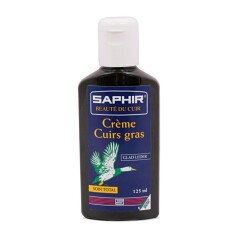
For those who want to try and maintain the original colour of their waxed leather shoes there is Saphir Greasy Leather Cream, this is custom made for waxed leather but is a much lighter product than dubbin. It is worth noting that all leather can darken over time but this particular product will slow down the process. Apply in the same way as dubbin.
If you enjoyed this article - please share with your friends...